Powder Room Reno
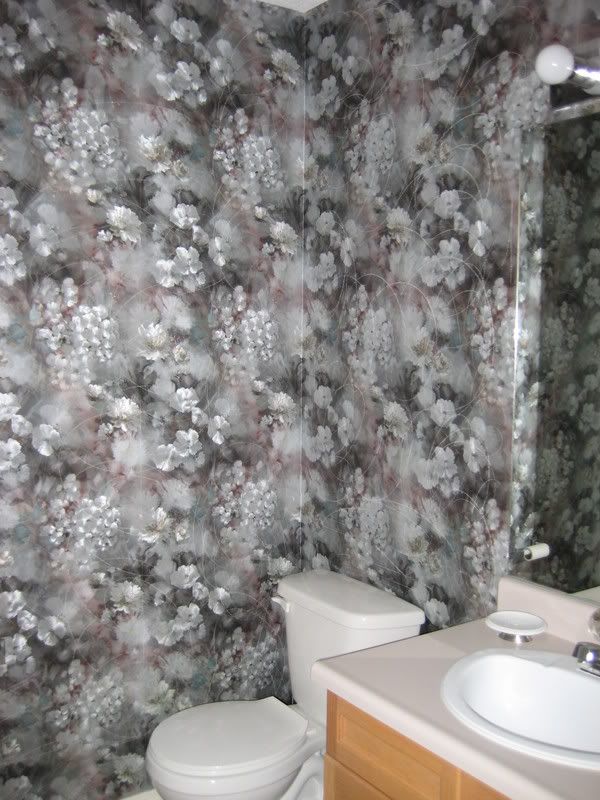
If you've been following our journey from the start you probably remember just how darn ugly most of our house was! It was plastered with tacky wallpaper and the outlets covers were hidiously modge-podged with strange images of panda bears and rice farmers. I should have taken at least another shot of this room because you can barely see the ugly pine vanity and movie-star lighting.
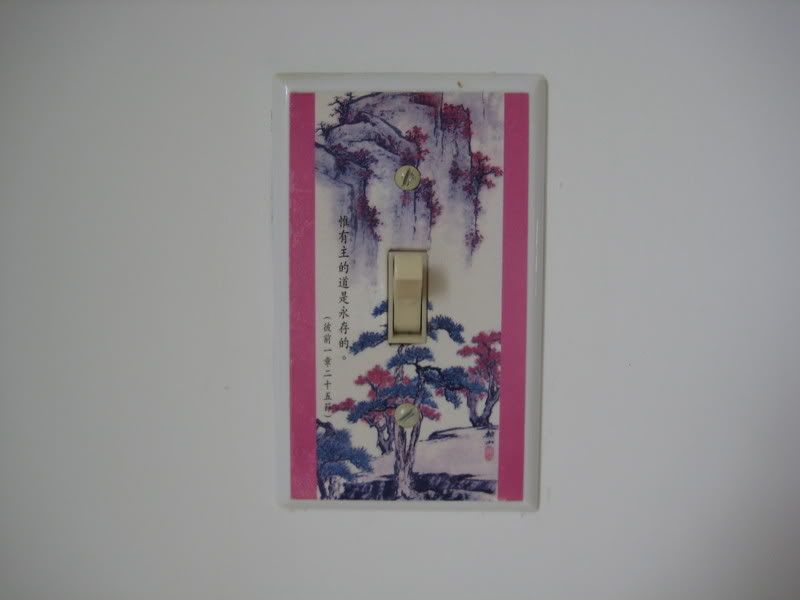
I might still have one or two of these in the kitchen if anyone is looking for a unique, artsy light switch. Although I am doubtful anyone will take me up on that.
We started this renovation around December 14, 2008, hoping to have it done by December 22 since we had offered to host Christmas eve. We got it all ripped out (as witnessed here) on time, but then Wren unexpectedly made her debut on December 19. So it basically sat in that state for about 2 months, which was not the best situation with all the guests you have with a newborn.
But eventually we got it done!
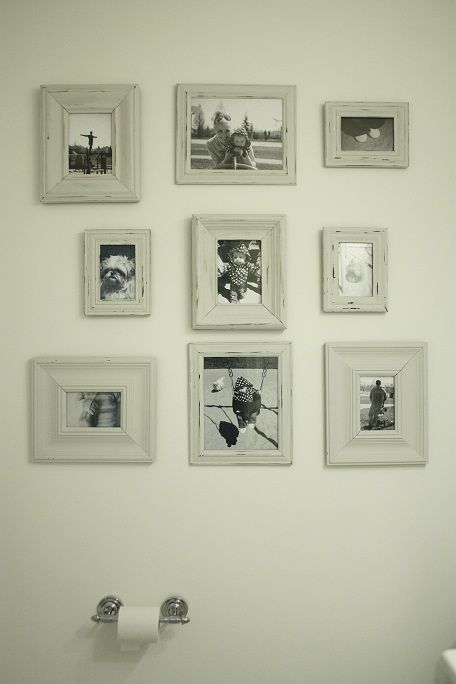
When you first walk in this wall is your first view so we wanted to make it interesting. I found all these frames at HomeSense for $1 or $2 (here is the low down on that project), painted them up and filled them with black and white photos from Wren's first day at the park.

We added a cheap and sleek new light fixture, but maybe we'll add pot lights later on when we extend the beadboard in to here as well.

The toilet that was already in the room was perfectly functional with good lines, so all we added was a $12 nickel plated knob. You can find them at Home Depot and it is probably the quickest way to take a builder basic toilet and make it look high-end. The knob, shelf, toilet paper holder and towel rack were from Home Depot as well (by moen).

We installed new tile, the same as in the laundry room, and staggered them in a brick formation for added interest.
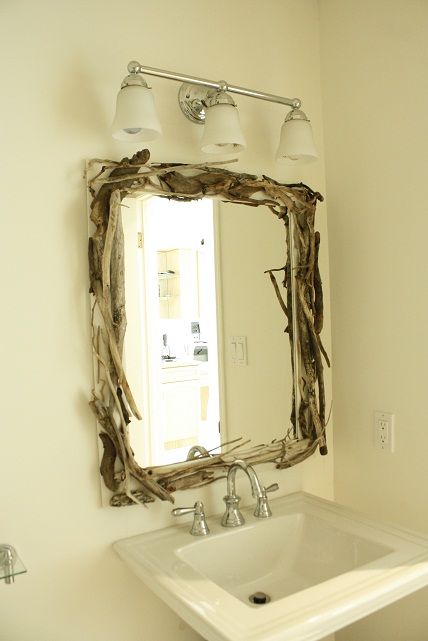
The biggest challenge was ripping out and replacing the vanity. Since it is a powder room we had no need for under counter storage and opted for a pedestal sink. I had picked this one out by Kohler but the price tag was a staggering $1400! The reason I loved it was because of the 8 inch faucet placement (I am not a big fan of the 4 inch faucets). This was probably our first taste of true bargain hunting (back in 2008!) , as we ended up finding the exact one in a clearance pile at Rona for $120. It pays to keep your eyes open!!
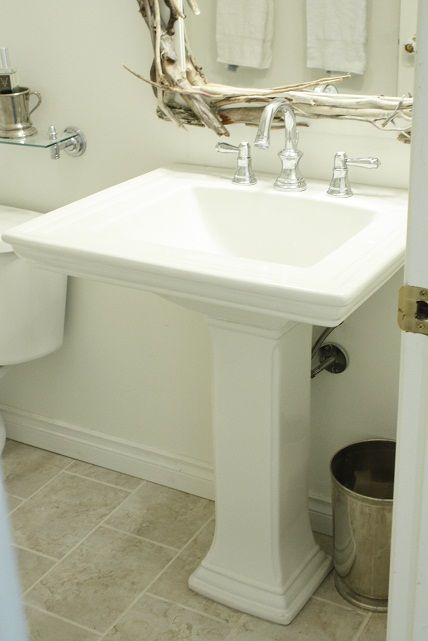
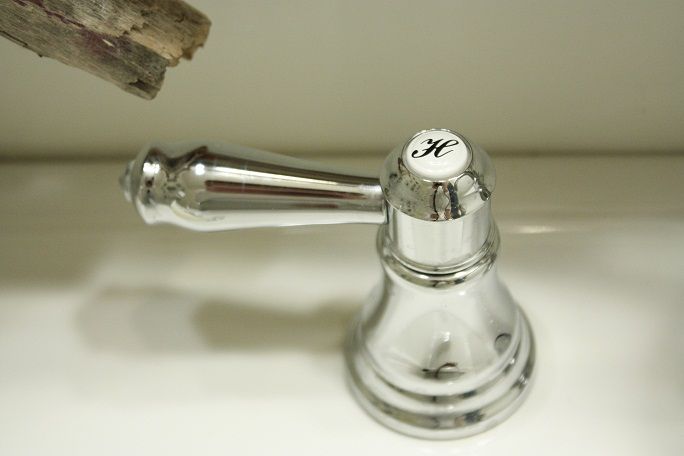
The faucet also came from Rona, and was $180. I love it's clean lines, yet it's nod to vintage style with the labelled handles.
 Our last and final additon is the driftwood mirror (instructions here)
So here is the final breakdown:
Tile, mortar, and grout: $220
Tile saw rental: $22
Pedestal sink: $133
Various plumbing tools and parts: $79
New heat vent: $3.30

I might still have one or two of these in the kitchen if anyone is looking for a unique, artsy light switch. Although I am doubtful anyone will take me up on that.

We started this renovation around December 14, 2008, hoping to have it done by December 22 since we had offered to host Christmas eve. We got it all ripped out (as witnessed here) on time, but then Wren unexpectedly made her debut on December 19. So it basically sat in that state for about 2 months, which was not the best situation with all the guests you have with a newborn.
But eventually we got it done!
When you first walk in this wall is your first view so we wanted to make it interesting. I found all these frames at HomeSense for $1 or $2 (here is the low down on that project), painted them up and filled them with black and white photos from Wren's first day at the park.


We added a cheap and sleek new light fixture, but maybe we'll add pot lights later on when we extend the beadboard in to here as well.

The toilet that was already in the room was perfectly functional with good lines, so all we added was a $12 nickel plated knob. You can find them at Home Depot and it is probably the quickest way to take a builder basic toilet and make it look high-end. The knob, shelf, toilet paper holder and towel rack were from Home Depot as well (by moen).

We installed new tile, the same as in the laundry room, and staggered them in a brick formation for added interest.
The biggest challenge was ripping out and replacing the vanity. Since it is a powder room we had no need for under counter storage and opted for a pedestal sink. I had picked this one out by Kohler but the price tag was a staggering $1400! The reason I loved it was because of the 8 inch faucet placement (I am not a big fan of the 4 inch faucets). This was probably our first taste of true bargain hunting (back in 2008!) , as we ended up finding the exact one in a clearance pile at Rona for $120. It pays to keep your eyes open!!

The faucet also came from Rona, and was $180. I love it's clean lines, yet it's nod to vintage style with the labelled handles.
 Our last and final additon is the driftwood mirror (instructions here)
So here is the final breakdown:
Tile, mortar, and grout: $220
Tile saw rental: $22
Pedestal sink: $133
Various plumbing tools and parts: $79
New heat vent: $3.30
Faucet: $180
Hardware (shelf, towel rack, mirror etc.): $260
baseboards: $8
Total: $905
A lot of work, but all worth it to no longer feel embarassed when your guests ask to use the washroom!