Get out your oven mitts!
This post is the rarest of Fun Lane posts: a baking post.
Those who know me best know that there are two things I cannot do
1. golf
2. bake/cook
Ok, I am pretty sure there might be a few more than 2 things on that list, but for the sake of my pride let's just leave it at that.
But one thing has been driving me to near insanity lately and that is driving half way across town at least twice a week to pick up my favorite cookies at my favorite bakery.
I discovered the chocolate meringues at Duchess a few months back and I am fully addicted. Like really addicted. And those of you who have graced the doorway of Duchess understand why my pocket book is feeling a little put off by this love affair. So I had to take matters into my own hands, which meant breaking out the bake ware and actually trying to come up with my own recipe!
So if you are wondering why these little mounds of delight are creating such a stir, just follow this easy recipe (even I can do it, so imagine what yours will taste like!).
The ingredients you will need are:
4 eggs
sugar
vanilla
chocolate chips
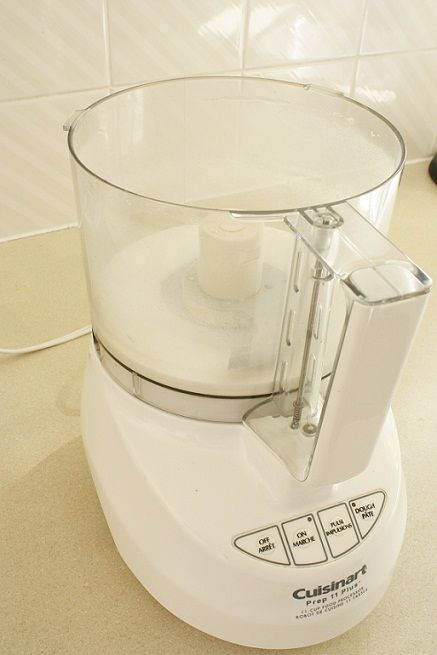
To start take your eggs and seperate the whites from the yolks. Let the whites sit out until they are room temperature (you won't need the yolks). While they are warming up I take some sugar (1/4 cup for every egg white so in this case 1 cup) and put it in the food processor. I like the meringue to be like silk so this really makes the fine grains even finer.
Once the whites are room temp I blend them with the whipping attachment on medium until the whites look foamy. Then you slowly start adding the sugar.
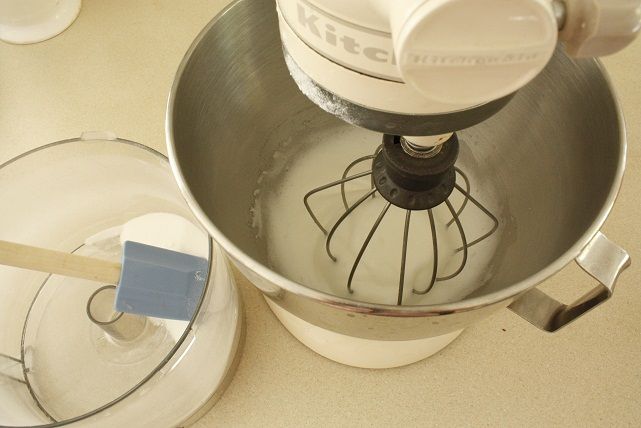
Some recipes add other stuff to get the texture really thick, but with the Kitchenaide mixer I have no problems getting them fluffy and stiff. Once the mixture can hold a peak add just a touch of vanilla extract.
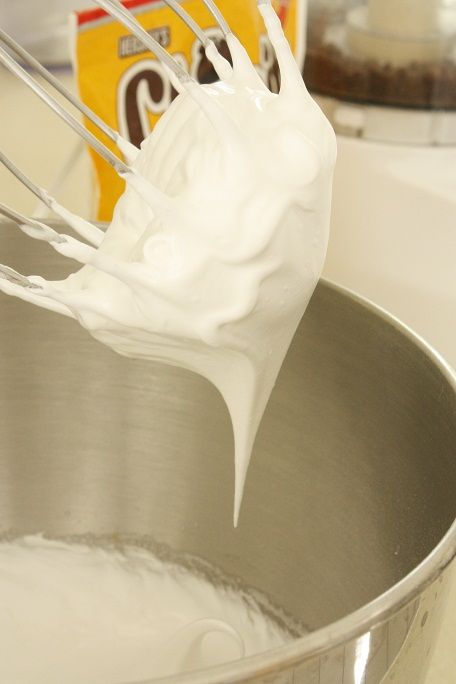
This is where the recipe goes from average to amazing! I take a half cup of chocolate chips and put them in the food processor as well so that they are little crumbs.

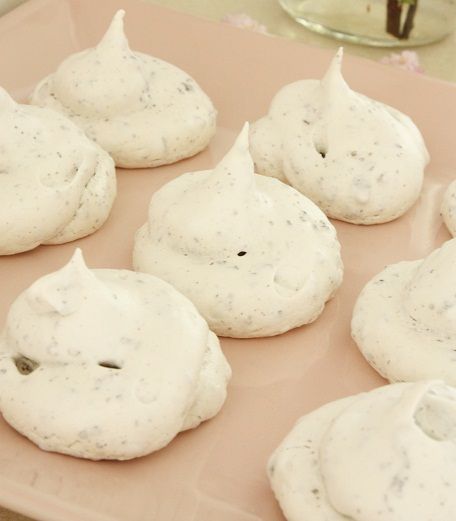
I mix it all together for just a second then spoon (or use a baggie with the tip cut off) to swirl them onto a Silpat sheet. You can use aluminum foil as well, but parchment paper really doesn't keep them from sticking.
Also a bit magical were these branches I spied outside today. I hadn't seen them in the yard last year so it was a pleasant surprise.

And speaking of the yard my mom and I went to our all time most inspiration place ever today, Wellington Garden Centre, and left with tons of great ideas, plants and accessories. Which has now spurred an intense desire to replace our old front door with a spify new double door. But Sean says he might have to do a little thinking on that before we make any major purchases (or holes in the wall). But regardless I bought some lovely box woods for the huge urns and two chandeliers to hang above each one.
Yeah, it takes some imagination to get at what I've envisioned, so new doors or not I will still share the urns and lights~
Those who know me best know that there are two things I cannot do
1. golf
2. bake/cook
Ok, I am pretty sure there might be a few more than 2 things on that list, but for the sake of my pride let's just leave it at that.
But one thing has been driving me to near insanity lately and that is driving half way across town at least twice a week to pick up my favorite cookies at my favorite bakery.
I discovered the chocolate meringues at Duchess a few months back and I am fully addicted. Like really addicted. And those of you who have graced the doorway of Duchess understand why my pocket book is feeling a little put off by this love affair. So I had to take matters into my own hands, which meant breaking out the bake ware and actually trying to come up with my own recipe!
So if you are wondering why these little mounds of delight are creating such a stir, just follow this easy recipe (even I can do it, so imagine what yours will taste like!).
The ingredients you will need are:
4 eggs
sugar
vanilla
chocolate chips
To start take your eggs and seperate the whites from the yolks. Let the whites sit out until they are room temperature (you won't need the yolks). While they are warming up I take some sugar (1/4 cup for every egg white so in this case 1 cup) and put it in the food processor. I like the meringue to be like silk so this really makes the fine grains even finer.
Once the whites are room temp I blend them with the whipping attachment on medium until the whites look foamy. Then you slowly start adding the sugar.
Some recipes add other stuff to get the texture really thick, but with the Kitchenaide mixer I have no problems getting them fluffy and stiff. Once the mixture can hold a peak add just a touch of vanilla extract.
This is where the recipe goes from average to amazing! I take a half cup of chocolate chips and put them in the food processor as well so that they are little crumbs.
I mix it all together for just a second then spoon (or use a baggie with the tip cut off) to swirl them onto a Silpat sheet. You can use aluminum foil as well, but parchment paper really doesn't keep them from sticking.
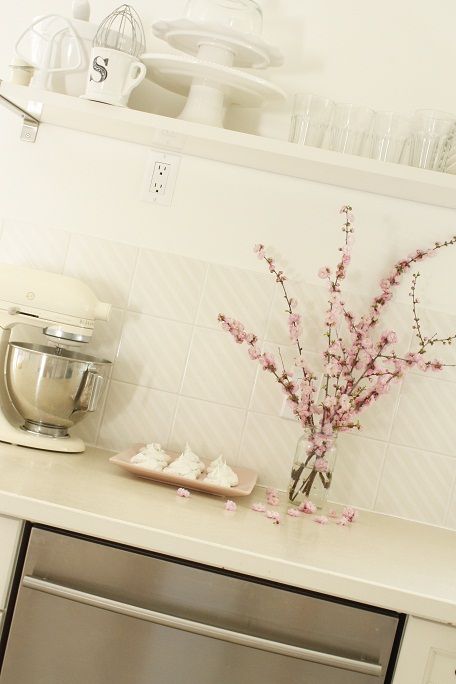
Place the sheet into a preheated 250 degree oven for about an hour and 40 minutes. I like to let them sit in the oven once I shut it off to let them get a smidge crunchier, but at the same time have a bit of a gooey centre (I don't like solid, rock hard meringues).
And voila you are about to taste pure magic!
Also a bit magical were these branches I spied outside today. I hadn't seen them in the yard last year so it was a pleasant surprise.
And speaking of the yard my mom and I went to our all time most inspiration place ever today, Wellington Garden Centre, and left with tons of great ideas, plants and accessories. Which has now spurred an intense desire to replace our old front door with a spify new double door. But Sean says he might have to do a little thinking on that before we make any major purchases (or holes in the wall). But regardless I bought some lovely box woods for the huge urns and two chandeliers to hang above each one.
Yeah, it takes some imagination to get at what I've envisioned, so new doors or not I will still share the urns and lights~
But until then, enjoy a little crunchy, goo-ey treat.