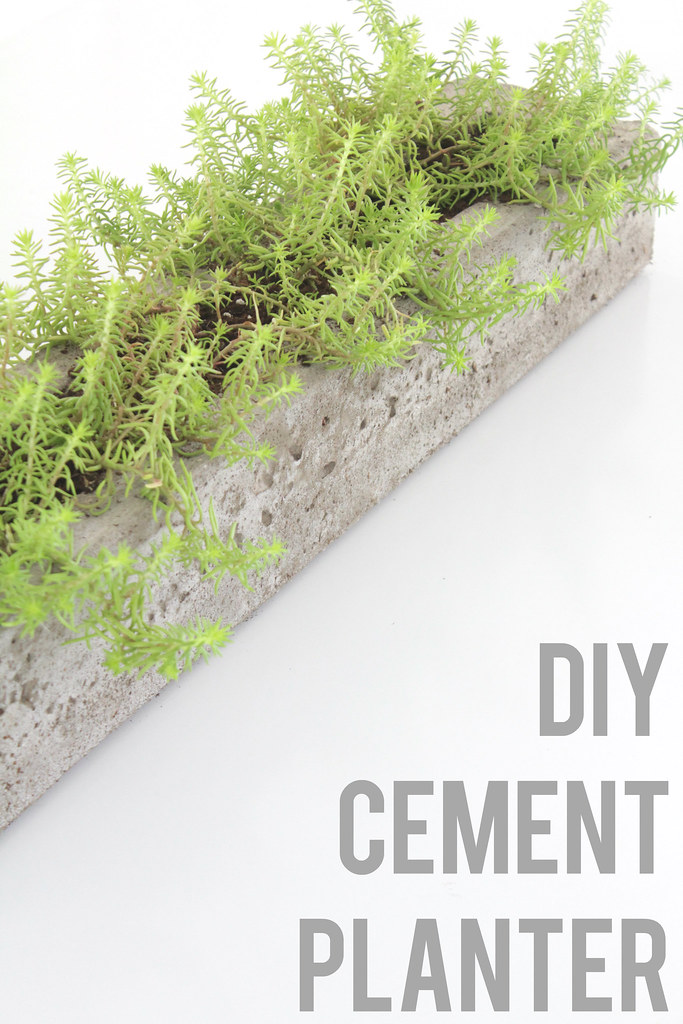
DIY Cement Planter
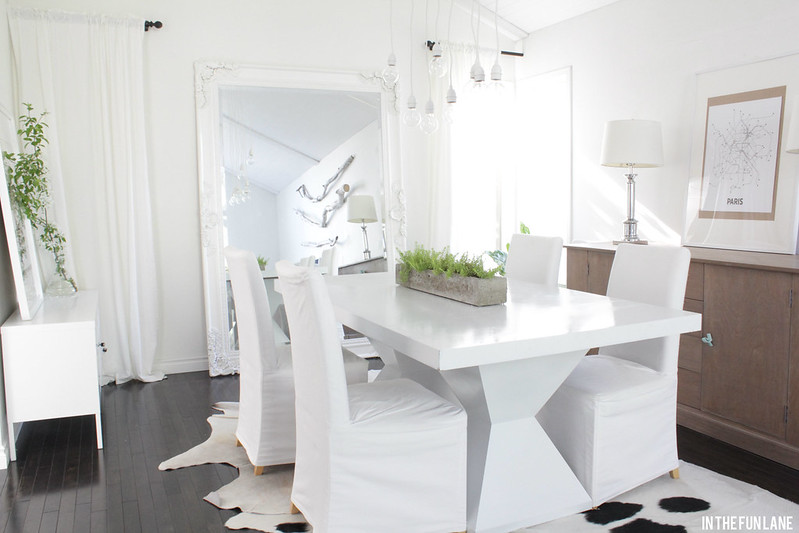
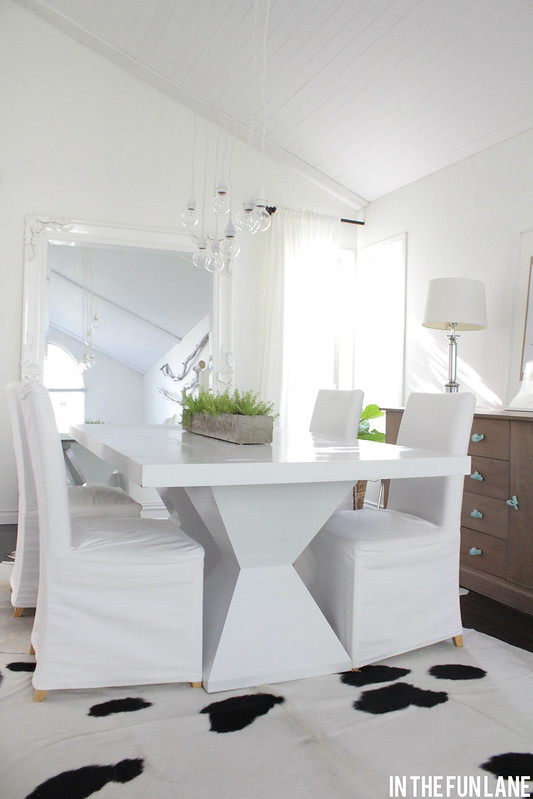
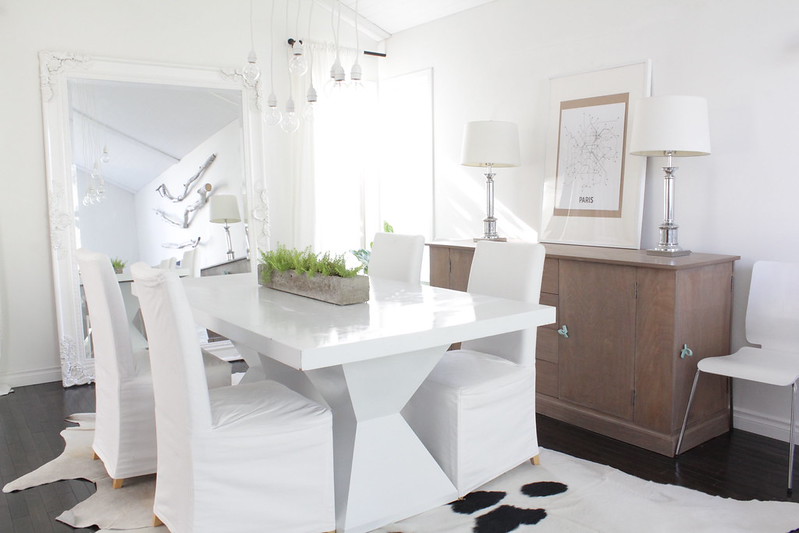
I have been brainstorming ideas and keeping my eye open for something to use as a centre piece on the dining room table. The table is long and is a lot of empty white space, it definitely needed something. But I wanted something simple, something not too 'in your face', and something that wouldn't break the bank (duh!).
Then one afternoon while Wren and I were getting a couple plants at the hardware store it hit me: make my own planter out of cement! I know there are tons of DIY blogs and Youtube blogs that have done this before so I am not trailblazing or anything. But I felt pretty darned proud of making my own creation for a grand total of $7.
Yes, this only cost me a $7 bag of cement, which I only used half of, so maybe more planter creations will be in my future!
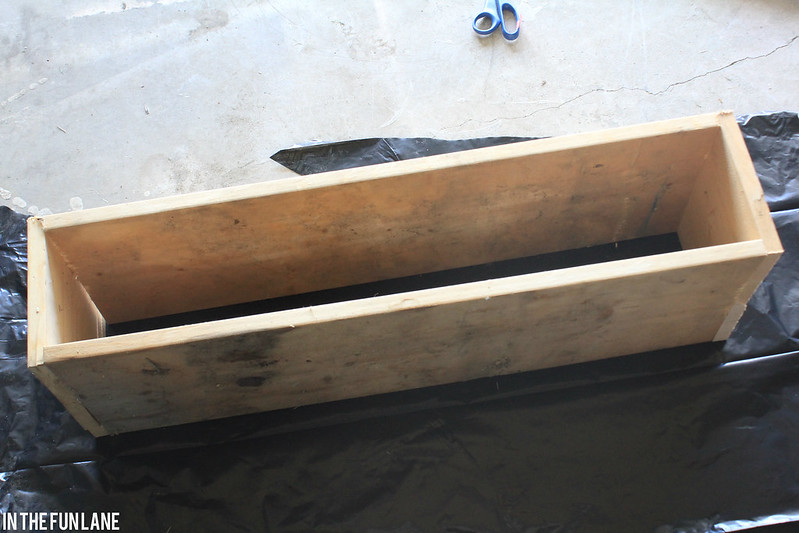
To start, I went into my scrap wood pile and cut a rectangle in the dimensions I was wanting. screwed it together and set it on a plastic surface ( a garbage bag in this case). I also made a smaller rectangle that would create my inner planter area.
I filled the large rectangle with about an inch and a half of cement, then set my inner form on top and filled the remainder of my cement to about an inch lower than the inner form stuck out. Then I tapped the outer rectangle with a mallet for a minute to get as many bubbles out as possible. I wasn't aiming for perfection so I didn't go too nuts.
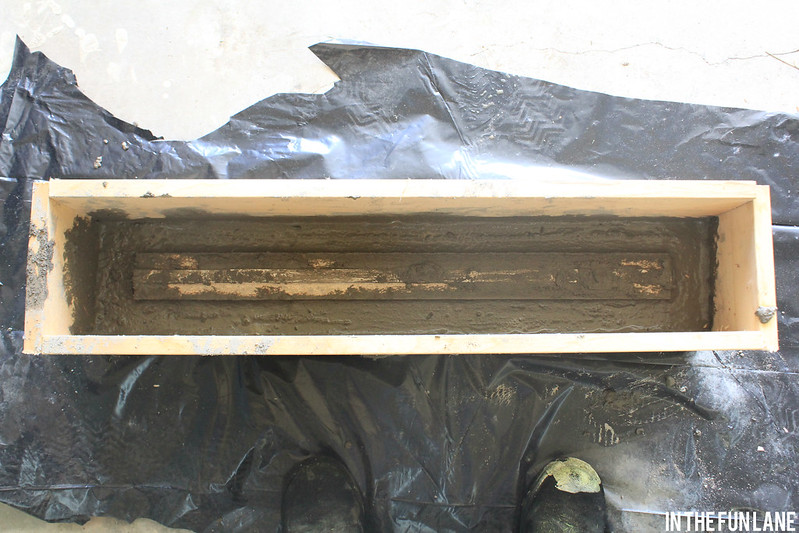
About 4 or 5 hours after I first poured the cement it was still pretty wet and pliable, and I gently removed my inner form at this point. It was really easy and while I was concerned the form wouldn't stay put without that in place everything did stay put. I then left the cement to dry for a day, then unscrewed and removed the outer form from the planter. Then we let it sit for 2 more days to fully cure before Sean kindly chiselled a couple spots to clean up the corner. He offered to smooth it and buff it as well, but I was totally in love with the rustic texture of the cement as it was!
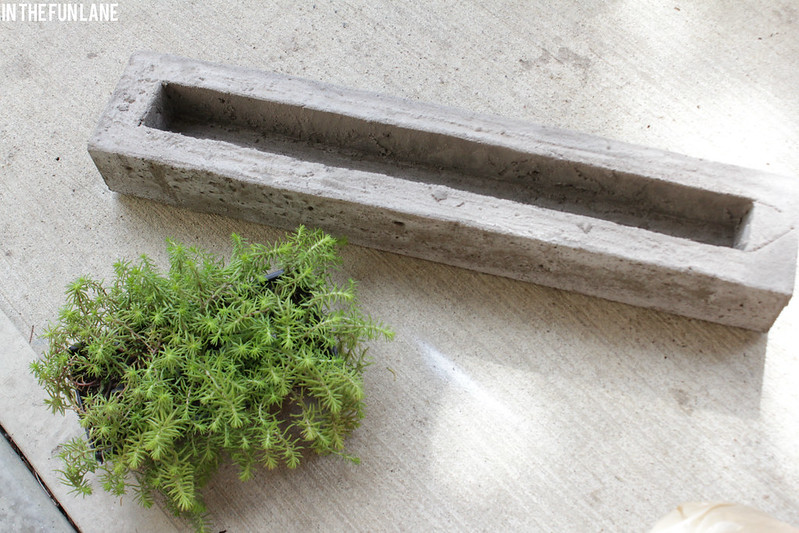
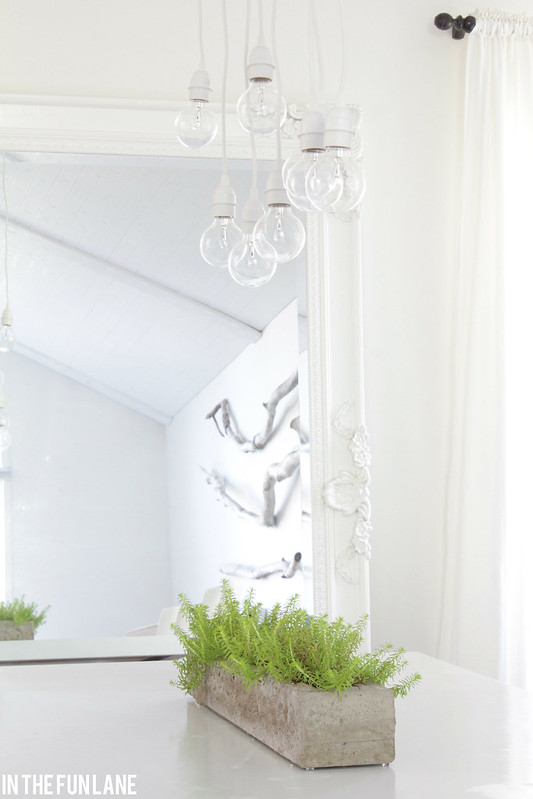
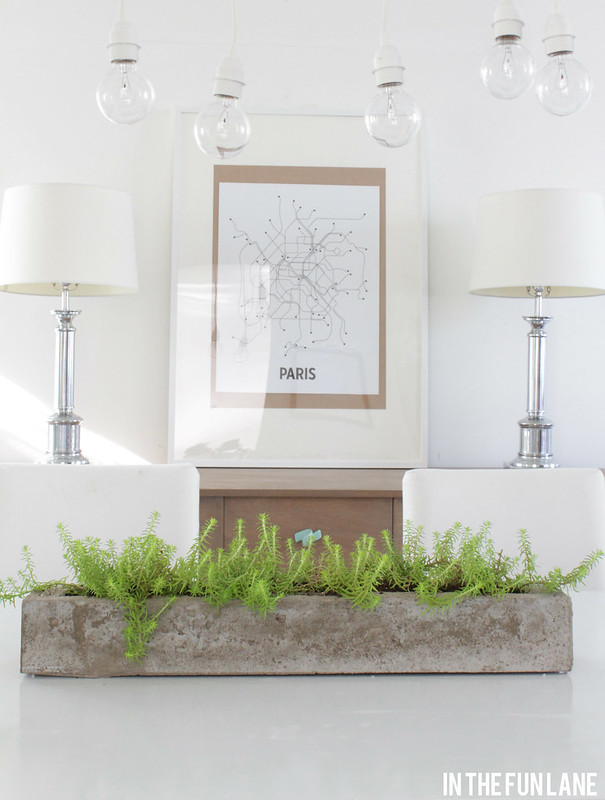
A 12 pack of ground cover planted in a row filled it nicely, and as soon as it was on the table I was in love!
I put 6 clear, sticky rubber feet (the kind you put on cabinet doors to keep from slamming) on the bottom to keep it from scuffing and scratching the table.
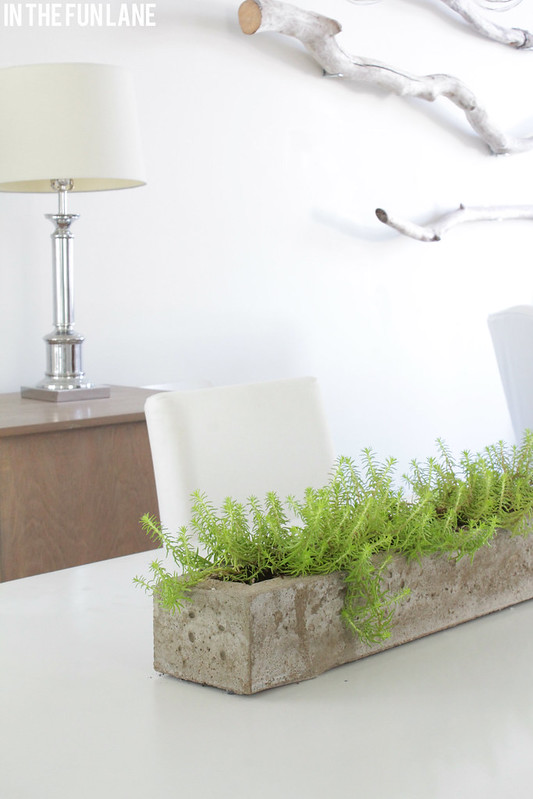
The subtle texture and pop of green it gives is exactly what I was envisioning.
I've never been one to patiently wait until I find what I was looking for, but I never thought I could actually pull this one off so I will admit to a small round of applause for myself once it was all done. Believe me when I say that the hardest part was being patient while it all dried.
so what do you think? Does it seem like something you might try?